
Traveling in the modern age means being tethered to our devices. From drones and mirrorless cameras to powerful laptops and foldable smartphones, the need for a reliable power source is non-negotiable. If you are tired of carrying a bag full of different “bricks,” you might be wondering how to build a universal USB-C travel charging station. Many nomads struggle with bulky adapters, yet learning how to build a universal USB-C travel charging station is actually quite simple with the right gear and knowledge. In this guide, we’ll break down the components and steps involved in how to build a universal USB-C travel charging station so you can charge everything from a single outlet. Once you master how to build a universal USB-C travel charging station, you will never have to worry about “low battery” warnings in a foreign airport again.
Why You Need a Dedicated USB-C Station in 2026
We have officially entered the era of “USB-C for everything.” With the EU mandates and global shifts toward universal ports, even the smallest accessories now use the same connector. However, not all USB-C setups are equal. A random charger from a convenience store won’t power a MacBook Pro or a high-end gaming handheld. A dedicated station ensures safety, speed, and portability.
Step 1: Choosing the “Brain” (The GaN Charger)
The foundation of your station is the power brick. In 2026, we use GaN 4.0 (Gallium Nitride) technology, which allows for massive power output in a chassis the size of a deck of cards.
Key Specs to Look For:
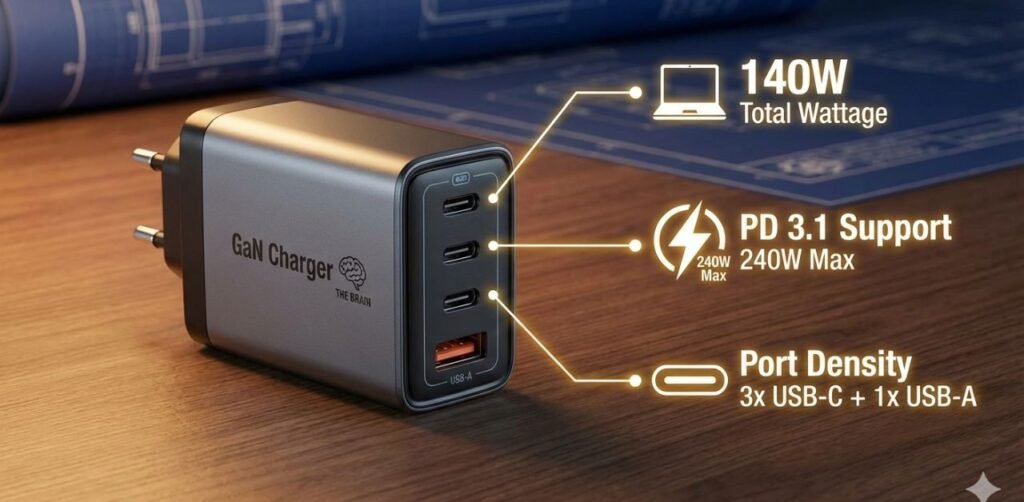
- Total Wattage: Aim for at least 140W to 200W. This allows you to split power between a laptop (65W-100W) and multiple smaller devices without slowing down.
- PD 3.1 Support: This is crucial. Power Delivery (PD) 3.1 allows for up to 240W over a single cable, future-proofing your kit for the next decade.
- Port Density: Look for a charger with 3x USB-C ports and at least 1x USB-A port (for legacy devices like older hotel alarm clocks or some rechargeable flashlights).
Step 2: Selecting the “Veins” (High-Wattage Cables)
Most people fail here. They buy a 140W charger but use a cheap cable that only supports 20W.
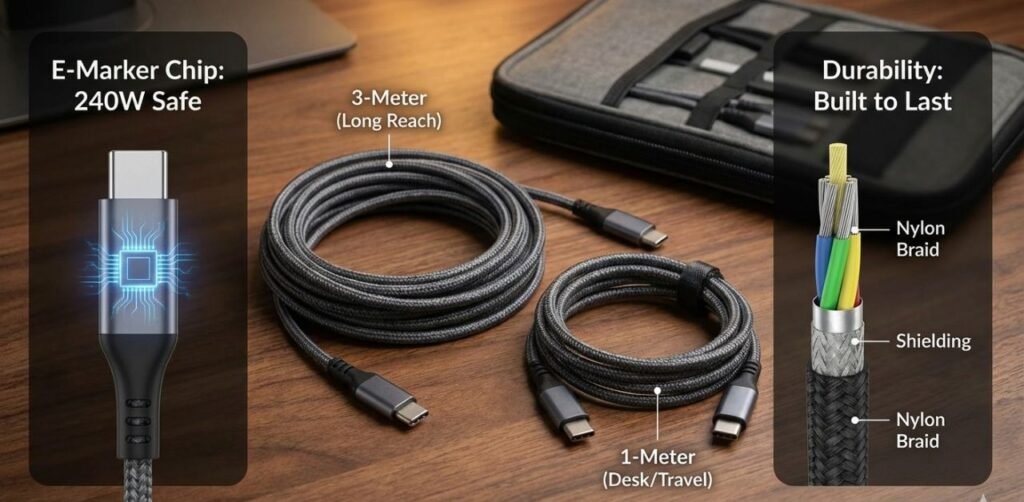
- E-Marker Chips: Your cables must have an “E-Marker” chip. This chip communicates with the charger to say, “Hey, I can safely handle 100W+.”
- Length Strategy: * 1x 3-Meter Cable: For those hotel rooms where the only outlet is behind the bed.
- 2x 1-Meter Cables: For desk work or charging on a plane.
- Durability: Only buy braided cables. They resist the constant bending and twisting that happens during transit.
Step 3: The Universal Connection (Travel Adapters)
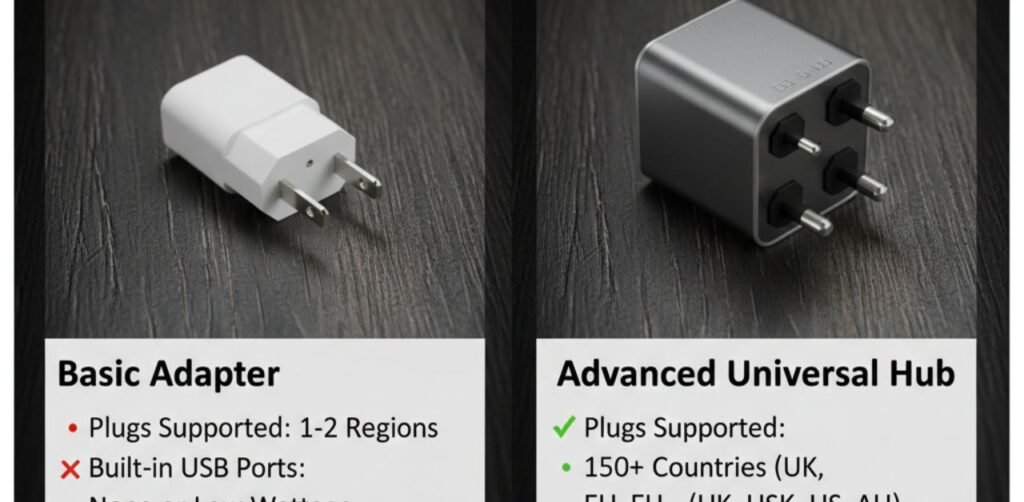
Your station needs to plug into the wall, whether you are in London, Tokyo, or New York. Instead of buying individual adapters, invest in a Universal Passthrough Adapter.
Comparison of Modern Travel Adapters
| Feature | Basic Adapter | Advanced Universal Hub |
| Plugs Supported | 1-2 Regions | 150+ Countries (UK, EU, US, AU) |
| Built-in USB Ports | None or Low Wattage | 65W-100W USB-C Built-in |
| Safety | Simple Fuse | Auto-Resetting Thermal Fuse |
| Size | Small but limited | Slightly larger but replaces 3 bricks |
Step 4: Organization and Cable Management
A “station” implies order. If your cables are a mess, your charging speed will suffer due to heat, and your cables will break sooner.
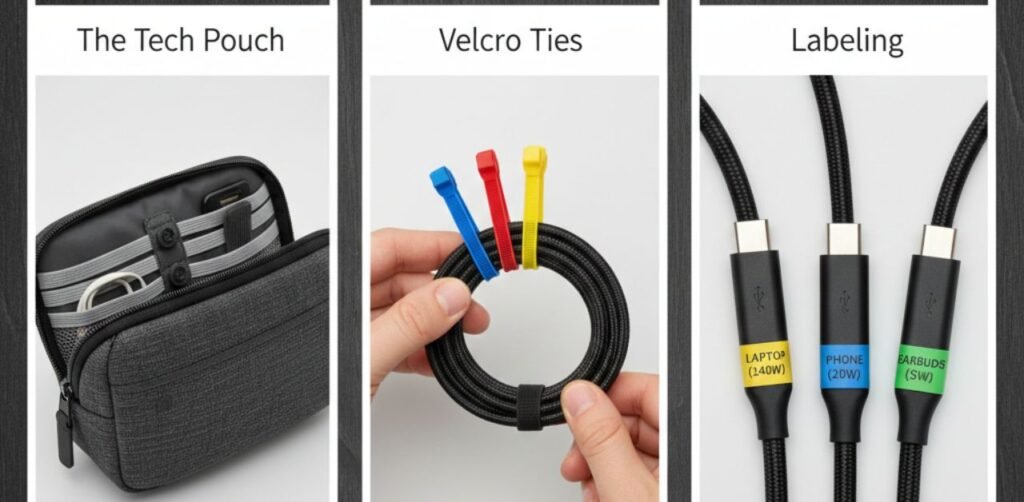
- The Tech Pouch: Use a semi-hard shell tech organizer.
- Velcro Ties: Never use rubber bands. Velcro ties allow you to adjust the length of a cable without tangling the rest.
- Labeling: In 2026, many cables look identical. Use small colored stickers to identify which cable is the “Ultra-Fast 240W” one and which is for low-power accessories.
Step-by-Step Checklist for Your Build
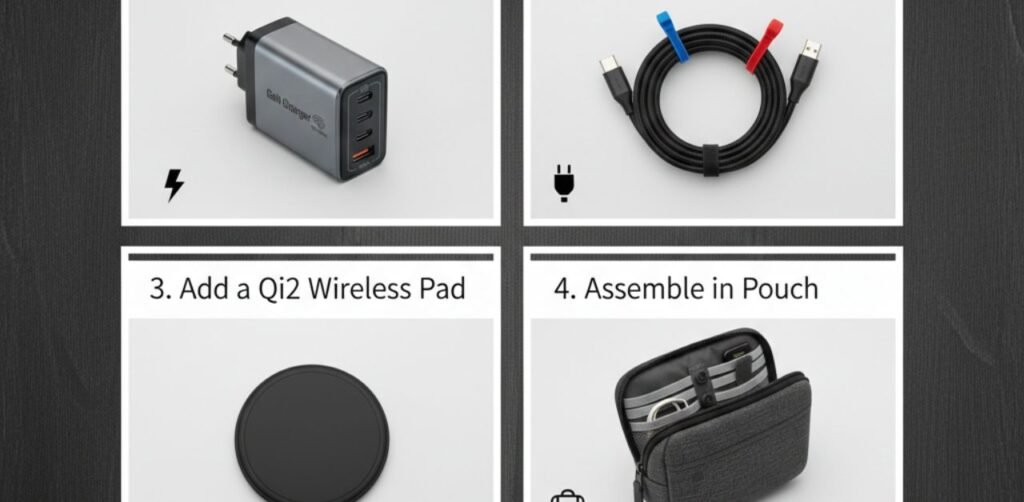
- Inventory your Gear: List the maximum charging speed of your heaviest device (usually your laptop).
- Purchase a GaN Charger: Ensure it exceeds the total wattage of your two most-used devices.
- Buy E-Marked Cables: Match the quantity to the ports on your charger.
- Add a Qi2 Wireless Pad: (Optional) A small magnetic USB-C pad for your phone or earbuds saves a port.
- Assemble in Pouch: Keep the charger, adapter, and cables together. Do not separate them.
Pro-Tip: Future-Proofing with PD 3.1
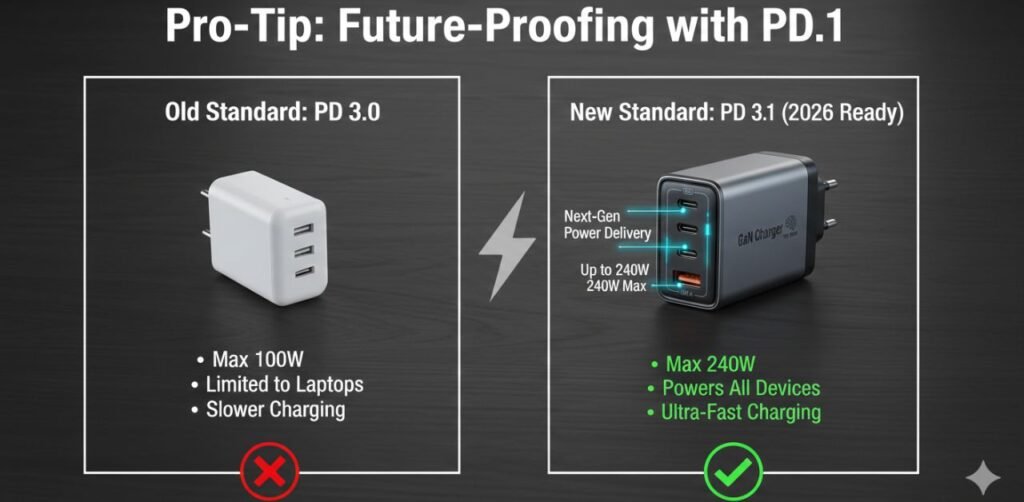
By 2026, most high-end laptops require PD 3.1. When building your station, don’t settle for PD 3.0. Even if your current phone doesn’t need it, your next one will. Investing in higher standards now saves you money in the long run.
Frequently Asked Questions (FAQs)
Q1: Can I charge my laptop and phone at the same time?
Yes, provided your GaN charger has “Intelligent Power Allocation.” It will automatically shift 65W to your laptop and 20W to your phone.
Q2: Is it safe to use high-wattage chargers on small devices like AirPods?
Absolutely. USB-C is “smart.” Your device will only “pull” the amount of power it can handle. A 140W charger won’t fry a 5W pair of earbuds.
Q3: Why is my “fast charger” charging slowly?
This is usually due to the cable. If the cable isn’t rated for high wattage, the charger will default to a lower, safer speed.
Q4: Can I take this station on an airplane?
Yes. Wall chargers and cables have no battery components, so they are perfectly safe for both carry-on and checked luggage. (Power banks, however, must stay in carry-on).
Conclusion
Learning how to build a universal USB-C travel charging station is the single best investment a modern traveler can make. It eliminates the stress of dead batteries, reduces the weight of your luggage, and ensures that your expensive electronics are being charged safely and efficiently. By combining a high-output GaN 4.0 charger with E-marked cables and a sturdy universal adapter, you create a powerhouse that can handle anything the world throws at it.
The future of travel is minimalist and efficient. With your new charging station, you are no longer just a tourist with gadgets; you are a streamlined, digital nomad ready for any destination. Start gathering your components today and experience the freedom of a truly universal setup!